Thursday, May 19, 2016

Machine Stitched -Hems

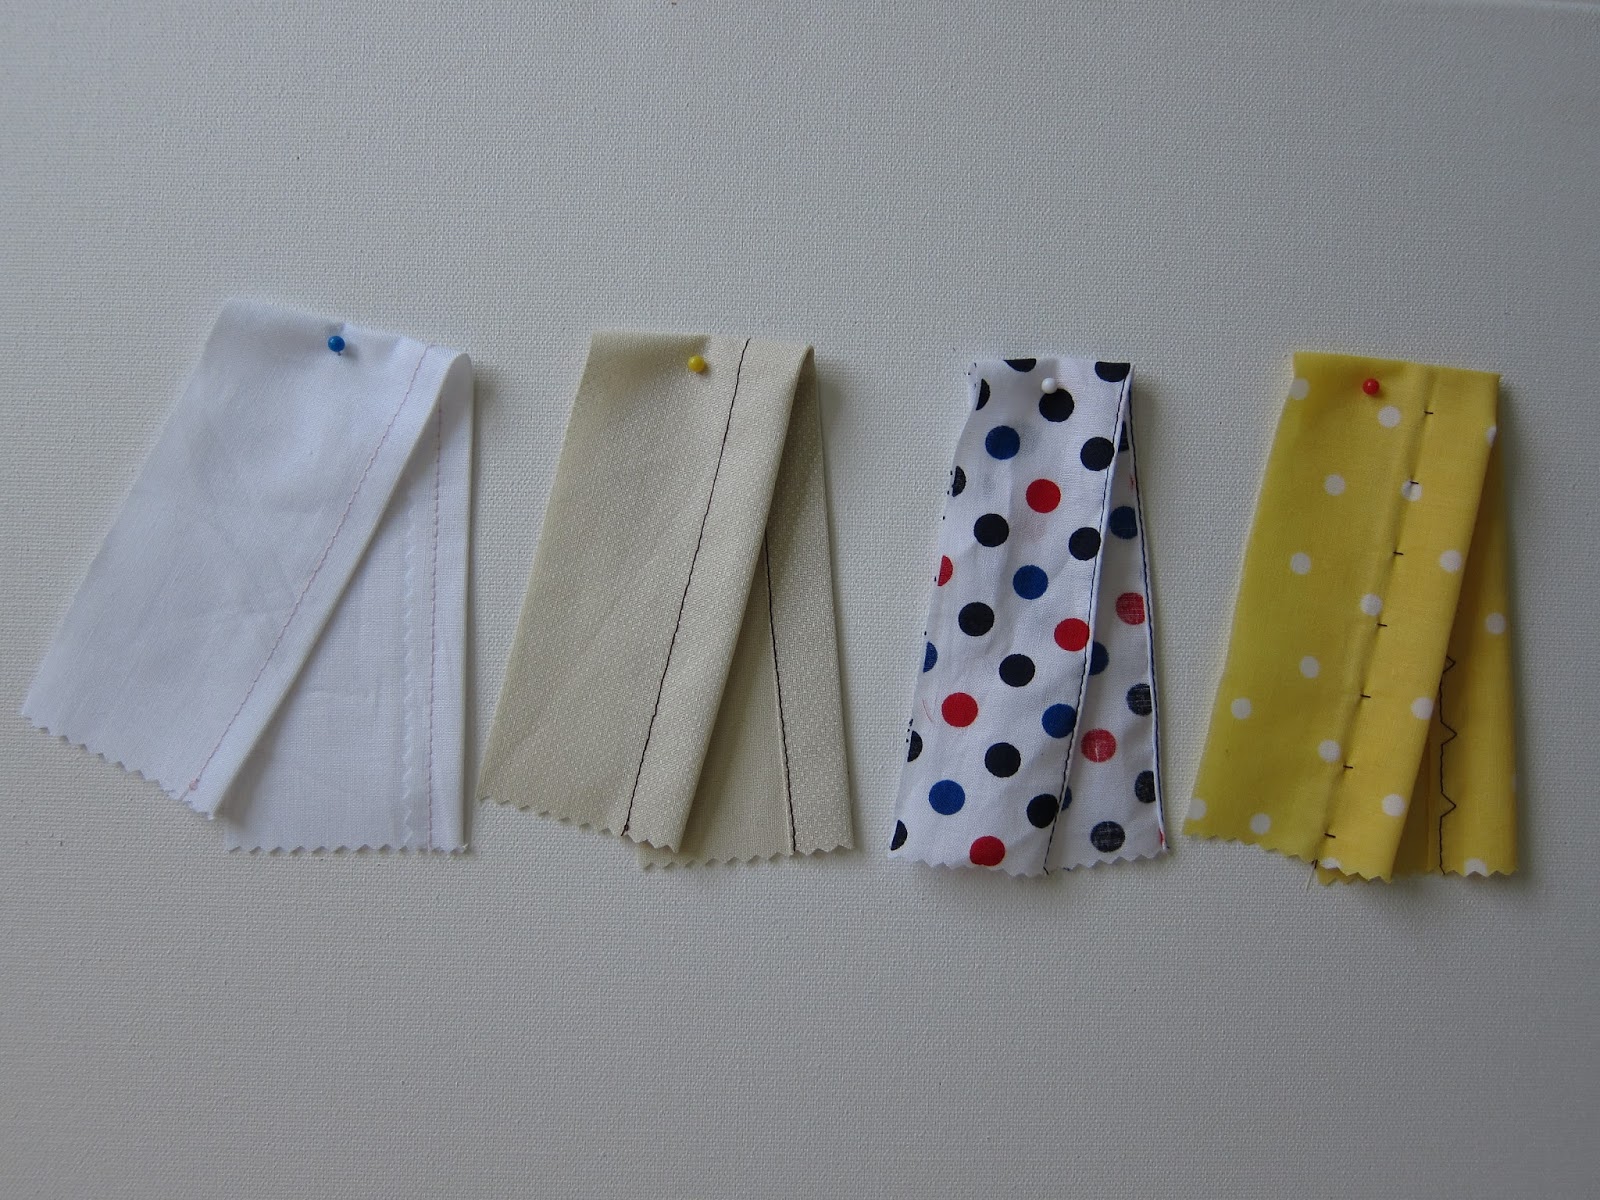
left to right
Single fold hem-Double Fold hem-Narrow Rolled hem-Blind hem

A look at 4 ways to finish a hem using your sewing machine.
Single Fold Hem- this is a basic hem. Simply pink or zigzag along the raw edge to stop it from fraying. Next turn the edge over once towards the wrong side, press and stitch into place using a straight stitch or decorative stitch and a all purpose foot.
Double Fold Hem- As the name suggest you fold the fabric twice towards the wrong side. The first turn is to hide the raw edge. Press after each turn and stitch in place after the second turn. To achieve a neat finish stitch slowly from the wrong side. Follow the folded edge.
Narrow Rolled Hemming Foot- This foot is designed to stitch a neat and  narrow double hem. The fabric is folded and stitched as it passes  through the coils in the front of the foot. On the underside of the foot is a small channel that allows the rolled hem to pass freely. To use a rolled hemmer foot, attach to machine, place the fabric wrong side up. Pull the hem allowance over the coils and slightly to the left. Stitch slowly, occasionally check that the fabric raw edge is rolling into the hem and is not exposed. Practice on scrap fabric first. The narrow hemmer foot is ideal for lightweight fabric. I have used a quilting cotton in my sample above.
Blind Hem Foot- This foot is used with a blind hem stitch to stitch an almost invisible hem. My machine has a stitch setting for firm fabric, the stitch is a row of straight stitches followed with one zigzag stitch, and a stitch setting for stretch fabric, the stitch is a row of short zigzags followed by a wider zig zag.  My blind hem foot pictured below is adjustable. This foot has a protruding guide that helps stitch in a straight line. To use the blind hem foot, fold raw edge of hem to the wrong side of fabric and press. Fold hem under garment with only a 1/4'' of hem showing on the right. The garment should be resting on the left. Stitch slowly on the exposed 1/4'', the protruding guide should but up against the top fold, make sure the zig zag stitch catches the top fold. When fished unfold fabric, on the right side there will be a row of evenly spaced stab stitches visible. Press to set the stitching.

left to right
All purpose foot-Narrow Rolled Hemmer foot-Blind Hem foot
 

Monday, May 16, 2016

Exploring Free Hand Machine Embroidery

Mug Rug
I enjoyed my first attempts at free hand machine embroidery so much that last week I purchased Simply Stitched Gifts by Cynthia Shaffer from my local Barnes and Noble. The book retails for $17.95. It contains 21 projects to make and a chapter on free-motion basics that covers needles, presser feet, fabric, stiffeners and adhesives, thread and also provides a practice free motion stitching guide sheet. Also in the basics chapter Cynthia explains the differences of  free-motion stitching, embroidery and quilting. Free motion stitching is stitching freely with the feed dogs lowered, free motion machine embroidery  means you are creating solid areas of stitching and in free motion quilting there is batting under the top fabric. The main difference between my first attempts at free hand machine embroidery and Cynthia's way of working is that were I used an embroidery hoop to hold the fabric, Cynthia uses quilting gloves to grip the fabric.
From the 21 projects in the book I chose to make the modern mug rug. I followed the 37 steps without a problem and am pleased with my finished rug (pictured above).
If like me you are new to free hand machine embroidery this is a good guide book with many contemporary projects to try. 


Monday, May 9, 2016

The Ottoman

I made the Apple Pie Ottoman from 'Sew What You Love' by T. Whelan. I purchased this book about a month ago, thinking I would make the bag projects but instead I have made the ottoman. The instructions for this project are well written. It's a super easy project to make. Best of all its comfortable to use as a floor cushion.
The book has about 30 projects, divided into four categories- handmade handbags ( 5 projects), sewing for little ones (this is the largest section in the book, it includes projects for soft toys, skirts and blouses for girls aged 1- 14), home style (6 projects including the ottoman, pincushions, storage boxes and a quilt), and personal style (8 projects for skirts, dresses and a tie). The book has something for everyone. Lovely photos, illustrations to explain each step, spiral binding and  full size templates tucked into a back pocket. The projects range from beginner to intermediate level. 'Sew What You Love' retails for $24.99.
Overall I am happy with my purchase and my new ottoman.

Breaking the Pattern- Review

I was excited to see a new sewing book at my local library last week. Without much thought I checked it out. The book is 'Breaking ...