Buying ready made cushions are expensive. They come is standard sizes of 14 x14, 16 x 16, 18 x18, 26 x 26, 12 x 16 or 14 x 28. Fortunately making your own cushions is easy, inexpensive and you are free to make the cushion in any size, shape, or colour you wish.
In this tutorial I am making a cushion insert that when finished will measure 11 x 22in. Why that size? well because I want cushions that will sit on each end of my sofa.
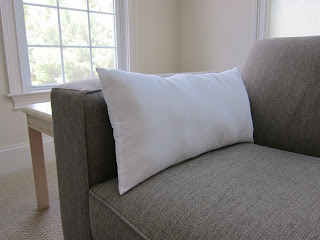 |
| plain and simple cushion |
To Make Cushions you will Need the Following
Materials
Fabric- I used muslin (calico) that I found in the remnant bin. For a cushion insert any plain fabric will do because it will be covered with prettier fabric when you make a cushion cover.
Matching thread
Polyester stuffing (Poly-fil)
Tools
fabric pencil
cutting tools (scissors or rotary cutter)
tape measure
iron
sewing machine
Steps
1 Wash and iron fabric
2 Decide on the size of the finished cushion and add 1'' for seam allowance. my finished cushion will be 11 x 22in. My cut pieces will measure 12 x 23in.
3 Cut one front and one back piece on the straight grain. To save time you can fold the fabric in half and cut both pieces at the same time.
4 On one long side measure and mark a 5 in opening for turning on the wrong side.
5 With right sides together start at one opening mark stitch around the perimeter with a 1/2 in seam allowance, stop at the other marked spot backstitch to secure stitches.
6 Trim the corners about 1 1/2 down the seam allowance.
7 On the side with opening, open and press seam back towards cushion. The seam will be neatly folded inside the cushion when you turn it right side out.
8 Turn right side out and stuff with Poly-fil. Take extra care to fully stuff the corners and smooth out any lumps.
9 Stitch opening closed using a ladder or whip stitch.
The next step will be to find some lovely fabric to make a cushion cover with.
Have a good weekend.


